Egg Joust Project
Kristian Fadrigon, Ellis Sutton, Eric Alipio
Period 4
Physics
Mr. Yav
The Trapper
Table of Contents:
- Introduction
- Design
- Construction Procedure
- Operation of Mousetrap Car
- Results
- Conclusion/Improvements
- Appendix
Introduction:
The purpose of this project is to demonstrate the property of conservation of energy, as it is transferred from elastic potential energy to kinetic energy. To demonstrate this, we must construct a mousetrap car that will travel a distance of 1.5 meters in the shortest amount of time. Additionally, the conservation of momentum will be observed as different groups’ cars come crashing together.Design:

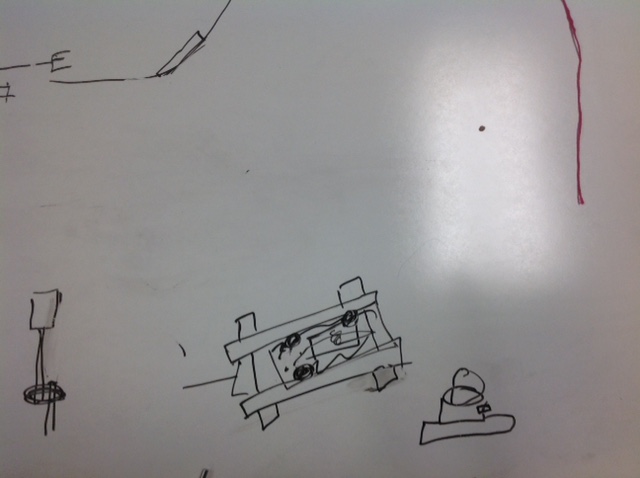
 In coming up with the design of our mousetrap car, there were several variables that we had to take into account. These variables include the size and type of the wheels, the wheel-to-axle ratio, the weight of the car, and the length of the snapper arm that pulls the string. In our initial brainstorming session, we opted for a decently-sized body with a smaller wheels and a longer snapper arm, which would also be used as a weapon for the joust portion of the project. We were also thinking of using a ramp to alter the direction of the opposing vehicles, but we decided to use a piece of cardboard and attach it to the end of the snapper arm that acted as a shield from the opposition's offensives. We chose small wheels because that allowed more rotations and thus a faster speed. The wheels we chose were rubber KNEX wheels that had a lot of friction, resulting in greater power and spin efficiency. We also decided to use a long snapper arm so that it disperses energy it one smooth, long pull, allowing for a greater distance. The body itself was constructed out of wood, which made our vehicle somewhat heavier than what is ideal, but we thought that we could balance out the weight by optimizing the conditions for the other variables, such as the snapper arm length and the size and type of the wheels. The following materials were used in the construction (bold indicates the item was found at home and its estimated price is listed):
Material
|
Price
|
Name
|
Mousetrap
|
$1.98
|
Kristian
|
Wood
|
$6.00
|
Ellis
|
Snapper Arm
|
$.50
|
Kristian
|
Wheels
|
$2.00
|
Eric
|
Axle
|
$3.99
|
Ellis
|
String
|
$3.99
|
Eric
|
Adhesive
|
$4.00
|
Eric/Kristian
|
TOTAL PRICE:
TOTAL SAVINGS: |
$9.96 ($22.46 total)
$12.50 |
Construction Procedure:
- To begin, we cut out 3 pieces of plywood. The first piece (the main body) is a by 10 cm large cut out. The 2 other pieces (the sides) are identical that have the dimensions of 25 by 3 cm.
- Secondly, we nailed each side piece to the long sides of the main body.
- Before we secure the mousetrap to the car, we removed all pieces that were not the spring or the lever.
- After, we nailed the mousetrap all the way back and to the right side of the body.
- Next, we duct taped a long, skinny rod to the lever in order to lengthen the pulling of the string.
- 3 inches from the tip of the rod, we taped a small cardboard cut out on to the rod as a shield.
- And then, we drilled 4 holes equidistant on the front and backside of the side pieces.
- We placed 2 skewers through the holes and capped each side of the skewers with our 4 KNEX car wheels.
- Lastly, we attached the lever of the mousetrap to the back skewer with a long piece of string.

Operation of Mousetrap Car:
Our mousetrap car works by the lever pulling the string which pulls the back skewer (the axle) and its wheels. Since our lever was extended by a long rod, the length at which the string is pulled is also extended, increasing the overall distance our car could achieve. When we pulled back the lever, potential energy was created. Once we let go of the lever, kinetic energy was released. Similarly, our 4 inch in diameter front wheels allow them to have more rotation and thus more speed than our back wheels. Our back wheels, being 6 inches in diameter, allowed our car to travel greater distances because it took longer rotations with less power needed. The big wheels in the front had more friction acting upon them as they had more surface area and more mass, causing our car not to travel as fast as possible. Since our car was made of wood and our parts were fairly bulky, we gained more momentum as our car moved because of its mass and increasing velocity. This allowed for a greater impact as it hit the other vehicles. To help minimize the change of momentum or impulse we added the shield which would dampen the impulse since the shield would bend slowing down the car.
Results:
Our car performed well for our first jousts, but the string and the back axle got caught, This caused our car to malfunction and not start the joust, resulting in us moving to the losers’ bracket. We ended 5th in the tournament. Our car’s acceleration was 0.2739 m/s2. We got this result from our time interval race, in which our car traveled 1.5 meters in 2.34 seconds. Our egg did not break during the joust, however it did fall out.
Conclusion/Improvements:
Overall, our design was solid, however the use of materials and execution wasn’t as so. The parts we would have kept in our design would be the wheels, the egg holder, and our makeshift shield. These three things worked well in winning our first jousts. However, we would have used stronger axles and a stronger lever. The axles, we could see, especially the back axle, we bending greatly which could have affected the friction against the rest of the car. The lever also bent a great deal. Since it bent back so much, this could have changed the speed or force at which the lever pulled the wheels, greater affecting the car as a whole. Also, we would have sanded down the edges and cut out any extra, unneeded wood so that the string wouldn’t have anything to get caught on and the car would accelerate faster due to the weight being decreased. This would also allow the car to start faster.
Appendix:
 |
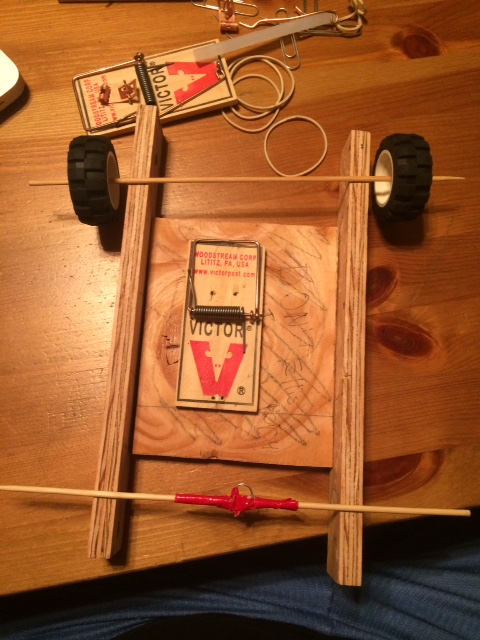
| Our final vehicle |
 |
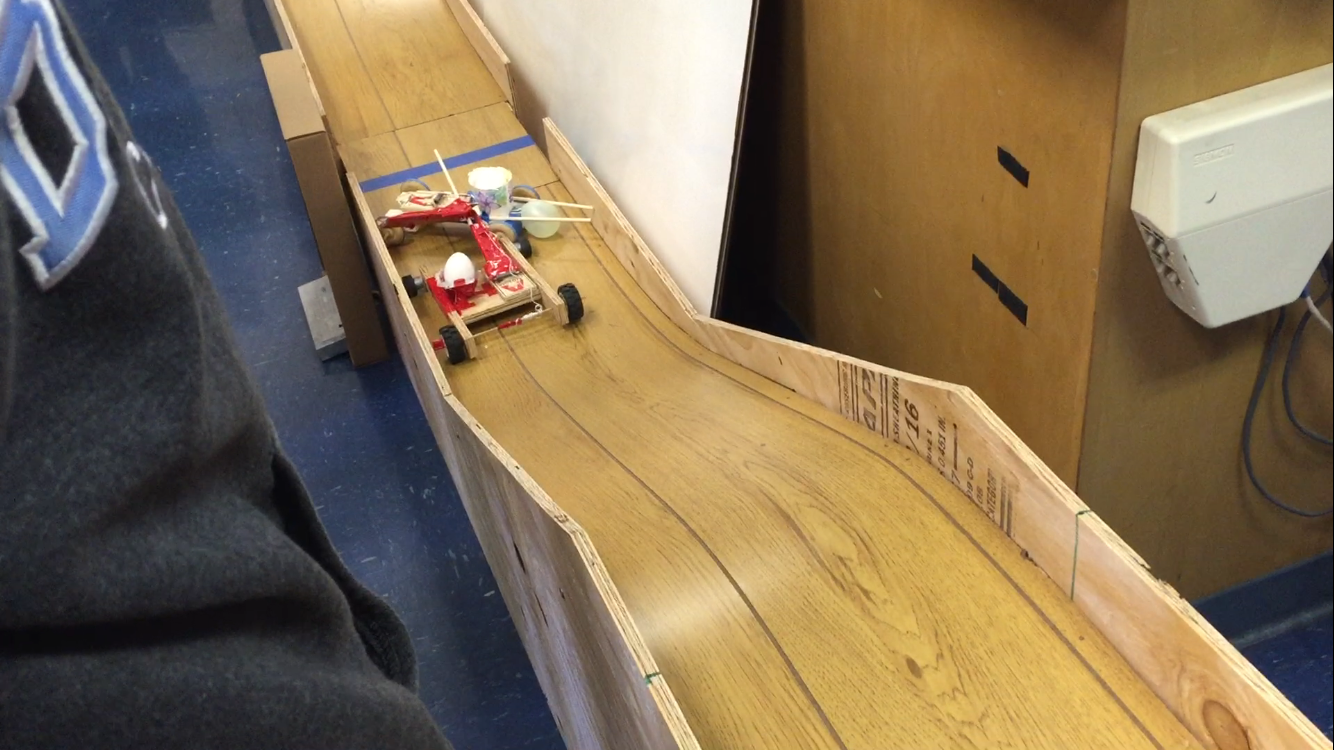
| Our final vehicle (fully extended) |
 |
| Our first victory over John W's group |
 |
| Our second victory over Luigi's group |
 |
| Our first loss to David's group |
 |
| Our second loss to Drew's group when our car failed to start |